Getting Started
This short tutorial will explain how you can setup a dialogue to do the following
- Show the character speaking with a typewriting animation
- Show which character is speaking
- Play a sound when a character says something ominous
You will learn how to:
- Setup the system from scratch and structure it properly
- How to create a node, its processor and link them through a data class
- Use the graph to link nodes together
- Handle skipping animations or any long-running task
It is recommended to be familiar with the GTK before getting started. You can find useful resources below:
Before you start make sure to refer to the Intallation Guide to add the dialogue system to your project
Creating The Graph
First, we need to create a graph. This will tell the dialogue system what should occur at a given point and what do to after.
Start by right-clicking into the prorject tab and go into Create/CLogic/Dialogue Graph/New Graph. Name your graph
accordingly and open it
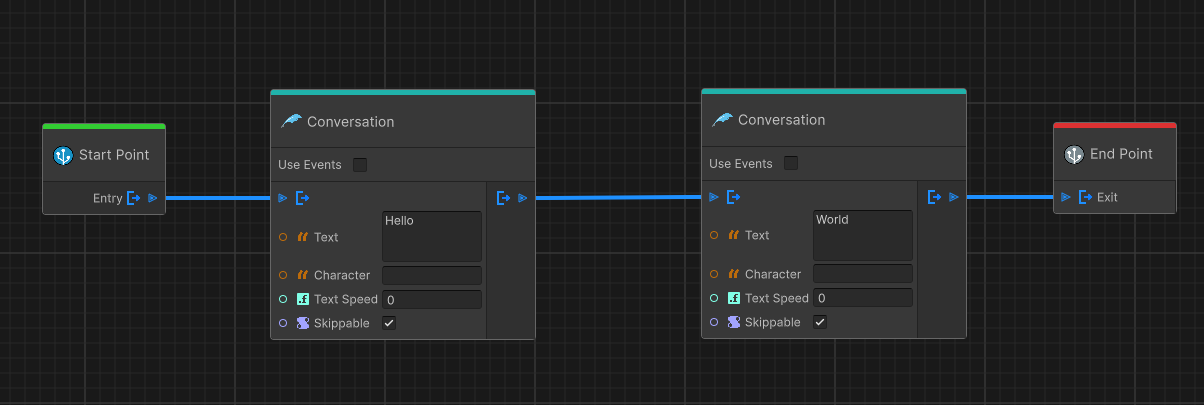
Now we need to add the entry point of our graph. This is necessary so the system knows where to start. We will also include an exit node to gracefully exit.
Note
Only one entry node is allowed per graph but multiple exit nodes can exist
Right click in the graph view or press space and select Start Point.
Now search for Conversation. This is a node provided by default that writes text using a type writer animation
Note
You are able to override this node and make your own. We will cover this later in this tutorial
In the node you will have multiple inputs (ports) in order:
- Execution port (shown as an arrow)
- Dialogue Text
- Speaking Character Name
- Typewriter text speed (0 uses a default value that we will set later)
- Skippable (tells the system whether the typewriter animation can be skipped)
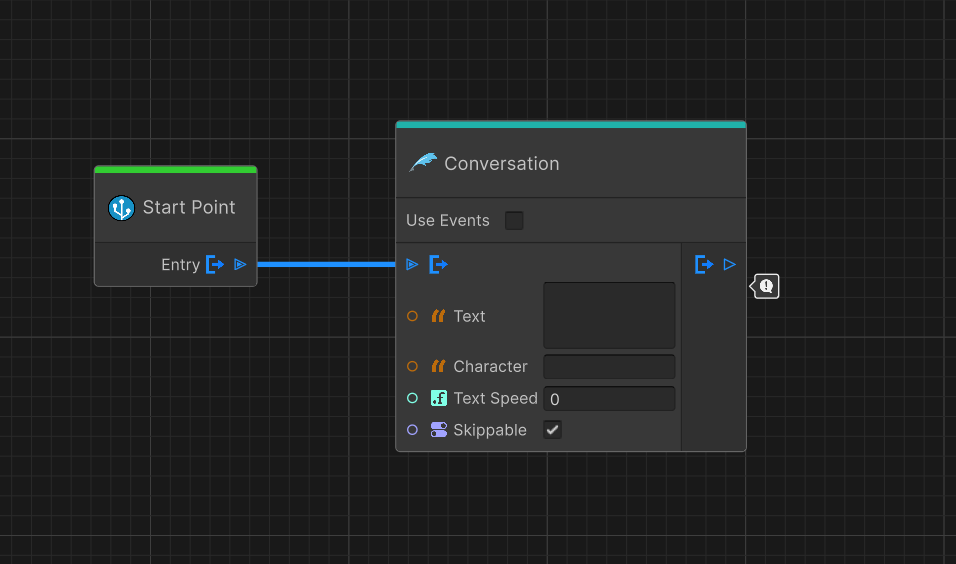
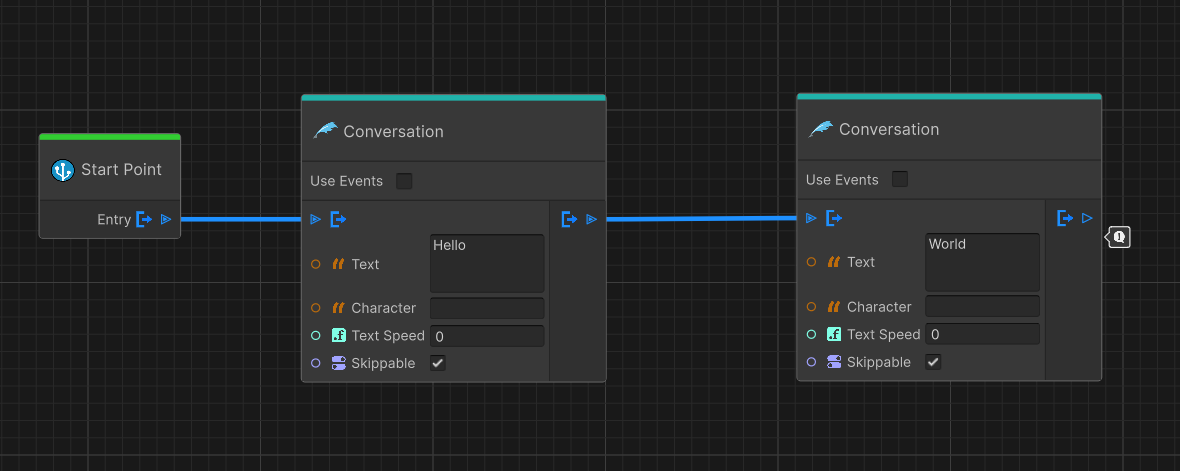
Drag from the execution port to anywhere else on the graph. Select Conversation again. This will
create 2 conversation nodes that will play one after the other.
Add text to them. "Hello" in the first and "World" in the second.
Notice an info tab on the right side of the last Conversation node. This indicates that the node
is not linked to an exit node. For now we will leave it as is and note what happens.
Save your graph; you may use the ctrl + s shortcut
Setting up the scene
First we need to add the Dialogue Director. This script will be responsible for executing the graph.
In the hierarchy go to Create/CLogic/Dialogue/Director which will create the director game object for you.
On the director game object add the DialogueProgressor script. This will be responsible for translating
player input to move the dialogue forward. Add an input action in Dialogue Progress Input field that the progressor will listen to.
To start playing your graph you can check the Play On Start toggle box and assign your graph in the field under it.
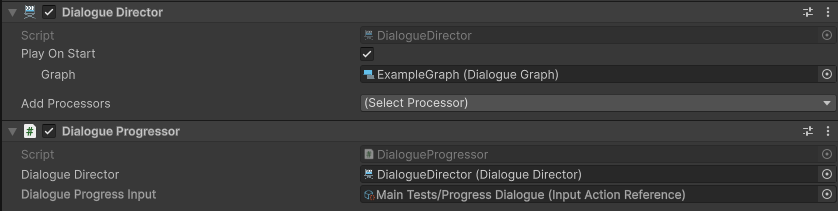
You can also play your graph by calling the PlayDialogueGraph function from the director via code or UnityEvents.
Processors
Each node on the graph need a way to process their data at runtime. This is done through a DialogueProcessor.
Each dialogue node needs a runtime equivalent processor.
Note
Start Point & End Point are special nodes that do not require processors
Processors are disovered at runtime by the Dialogue Director. The latter will search for processors on himself or child game objects.
For our Conversation node we will need the Conversation Processor. To make things easy you can use the Add Processors dropdown on the Dialogue Director.
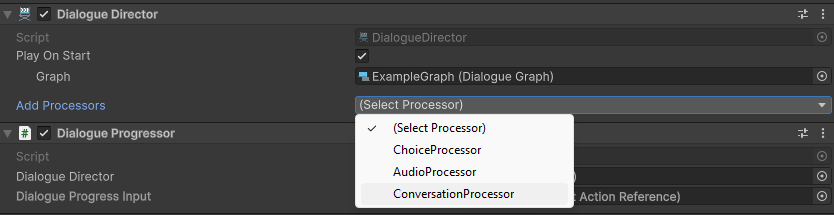
This will automatically add the selected processor on the same game object.
Setting up the UI
The conversation processor requires 2 text objects to display the speaker name and character dialogue.
The character dialogue requires a TypeWriter to animate the text. When adding the type writer make sure
Auto Start is disabled.
You can create a TypeWriter by right clicking on a canvas object and Create/CLogic/Dialogue/TypeWriter, this will create the text component with the TypeWriter component attached to it.
Speed Words Per Win is the default speed that the type writer will write if our conversation node
uses a 0 speed. You may leave it at 120 WPM or adjust as needed.
You may create the UI as you wish as the dialogue system is meant to be as modular as possible to cater for all your dialogue needs.
Testing Our Dialogue
Start the game and press the key you input into the Dialogue Progressor. Watch as the dialogue plays
one after the next and that the character name field is empty.
Upon reaching the end you will get a warning in the console. This is because we did not specify a graceful end for the graph.
Go back into the graph editor, adjust the character name and link the last node to an End Point.
Play the graph again and notice the character names visble and no warning once the end is reached.
Using Events
The dialogue system also allows you to run actions when a specific node is played
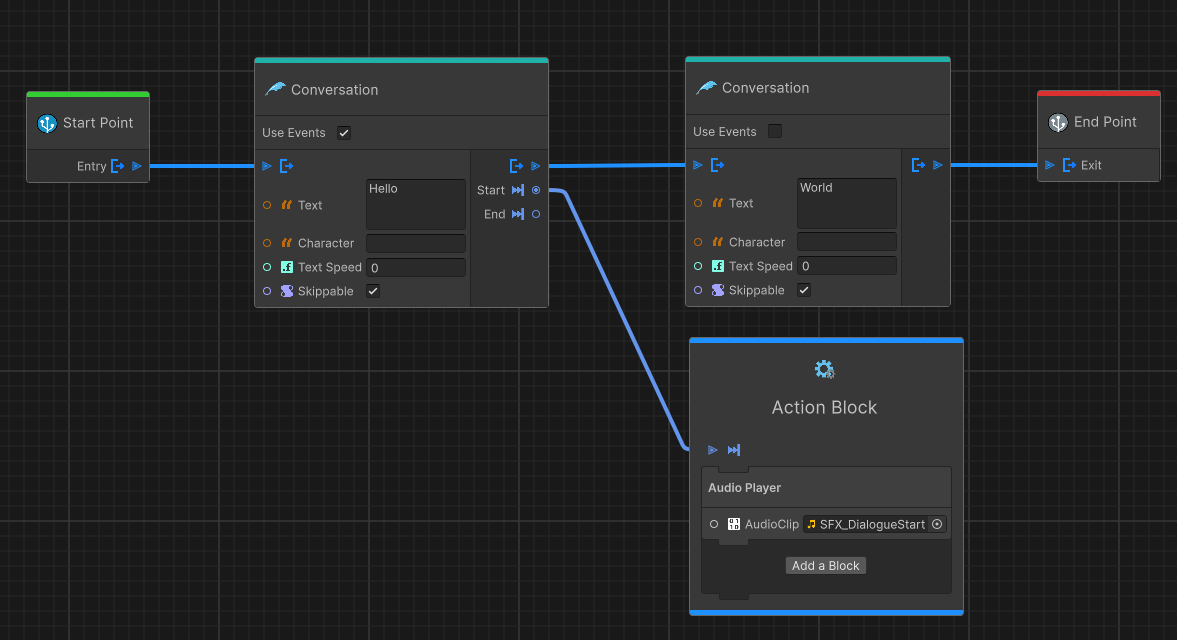
directly from the graph. Events are added using an Action Block.
First go into the first Conversation Node and enable the Use Events option. This will
add 2 new output ports: Start & End.
- Start events are ran before the node is processed
- End events are ran before the start of the next node
These ports will only connect to an 'Action Block'. Drag the Start event and link it
to an Action block.
In the action block, add an Audio Player. This will play the provided audio when the
node is processed.
Now we need to add a processor for this action in the same fashion as we did with the conversation
node. Add the Audio Processor then create and assign an audio source.
Finally, enter play mode and listen to the audio playing.
See Creating Custom Action for more details.
Branching Dialogue
The CLogic Dialogue System also provides a ChoiceNode to allow dialogue to diverge into different
or same ending.
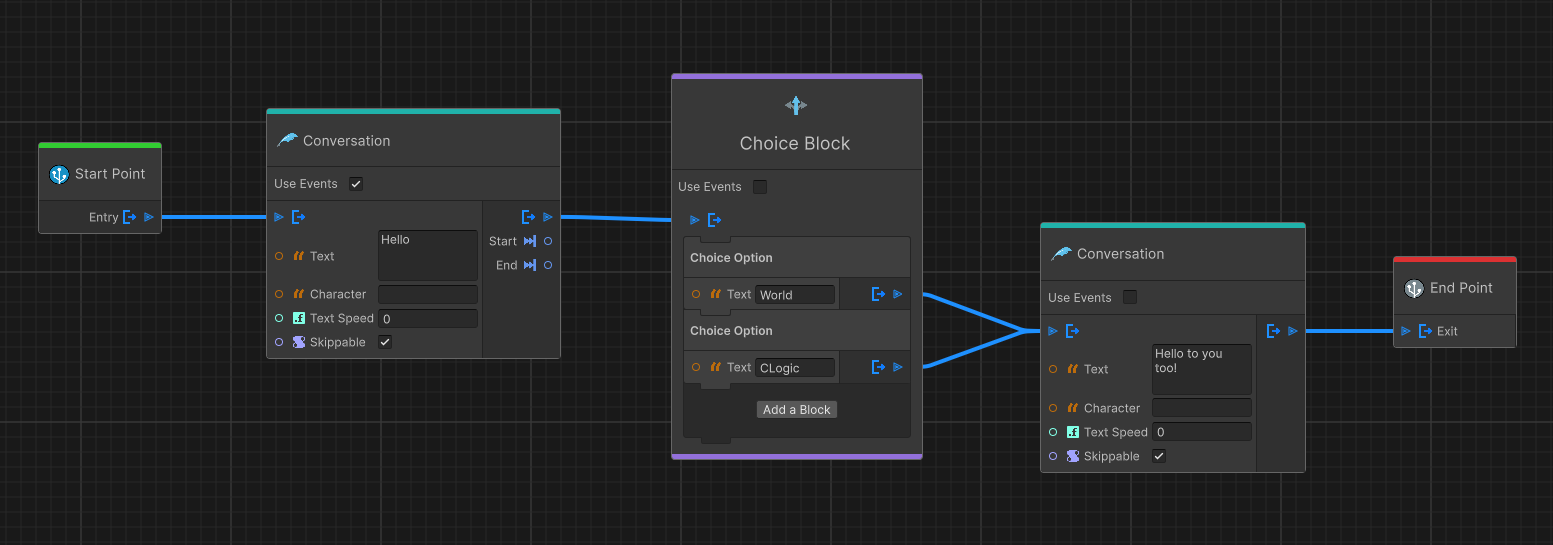
Make sure you remember to add the Choice Processor. For this you will need to create and assign a button prefab
that will be spawned in the specified container and linked to each choice option.
By installing CLogic.Conditional you are able to add conditions to your choice nodes
Tip
If you do not wish to use the conditional system, you can create your own choice block with your own conditional branching logic.
See Custom Context Nodes for more details